Tuesday, 10 June 2014
The Nettle Experimant.
Well, The nettles came out of the retting bath yesterday.
My! Didn't they smell (like rotting seaweed).
I remember someone saying that they needed to be in there long enough for the leaves to come away easily. But, I could not put up with the smell any longer besides I live in a built up urban area and I do have my neighbours to consider.
They are now drying in the back garden.
Friday, 6 June 2014
Fibres from Nettles
Traditional Fibres from Plants
After working with flax for some years I hve started to do a more in depth experiment with nettles.
I love processing flax, it is a beautiful process.
Firstly the flax is pulled from the ground as the fibres we want run up the length of the stem, referred to as bast fibres. This method of harvesting preserves the length of these fibres.
Whilst it has these great fibres it also has a woody tubular core. This bit we do not require.
The flax is then bundled up and the retted. That means it is soaked in water to start the breakdown the bond between the woody core and the fibres to help with their separation later. There are different ways of achieving the same goal but this is how it is done here.
Once it has reached the right level of retting it is taken out of the water and dried thoroughly. This is to stabilise it for storage and to make the woody parts of the plant as brittle as possible.
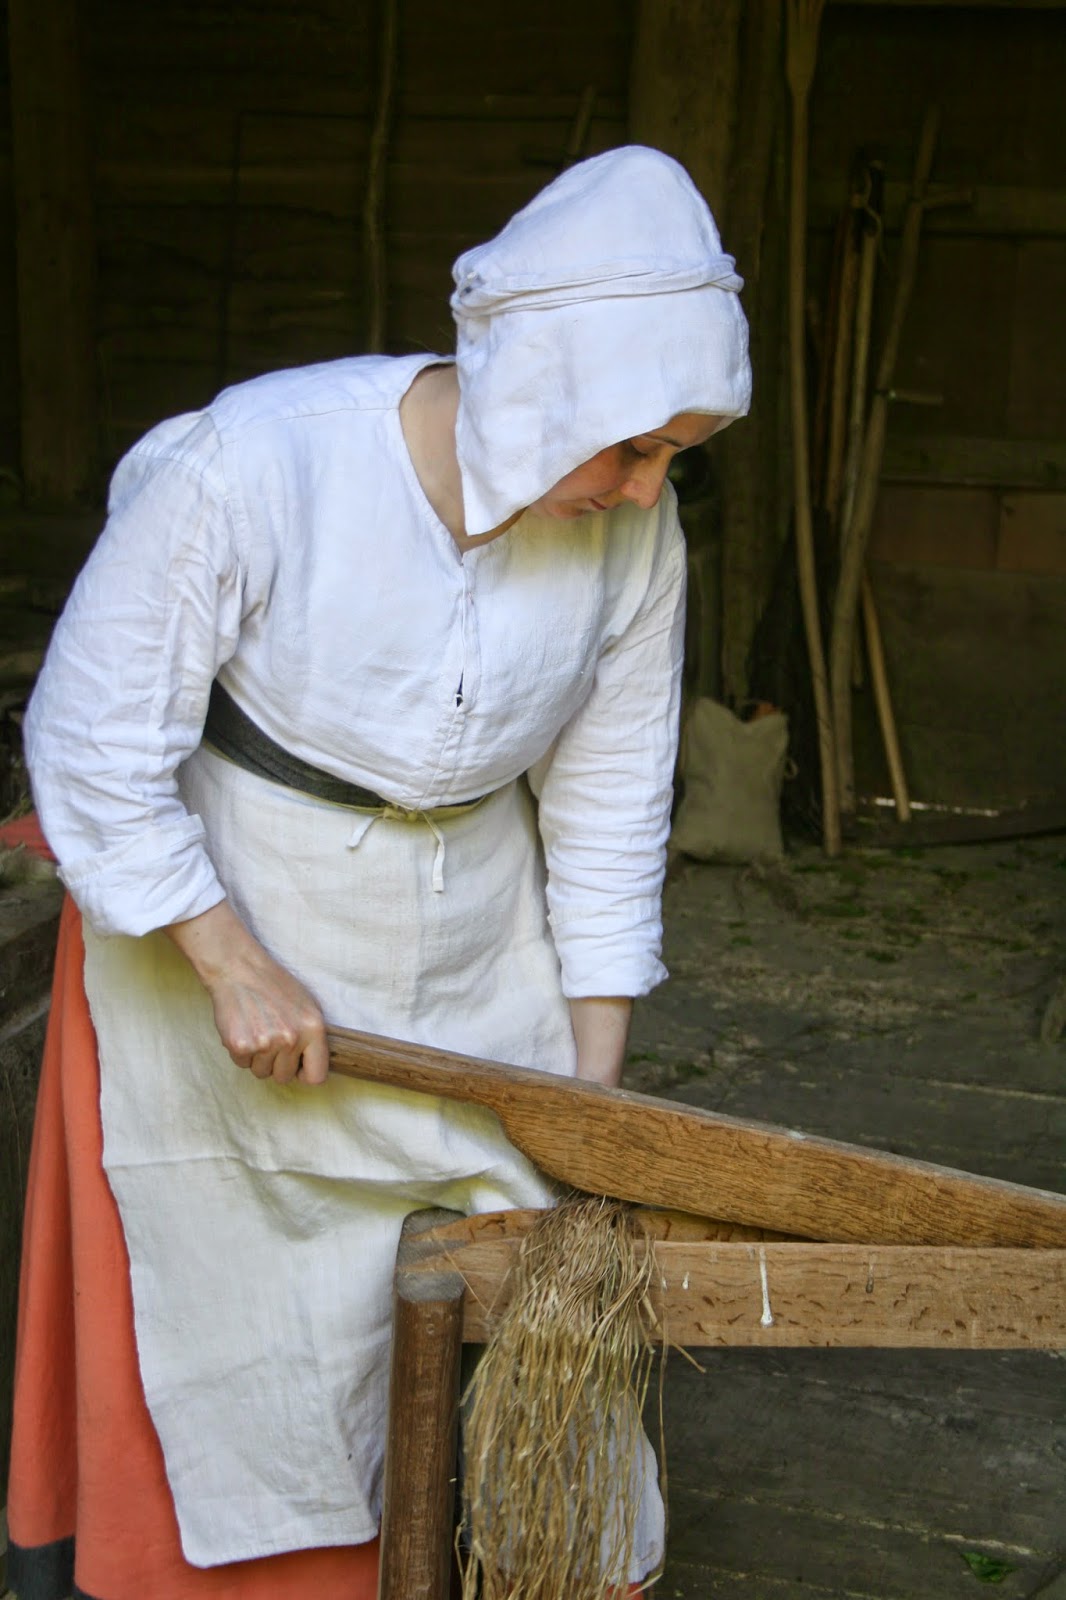
When it is time to start processing you start with the breaker (above). This breaks up the woody parts of the plant. You insert your stems into this device and use a chopping action with the wooden guillotine.
The next is scutching. This beats and brushes away the woody parts of the stem. This was traditionally done on the scutching board with the flax knife. It is at this point it starts to look like flaxen hair.

Then it is heckling or hackling. Effectively you are combing the flax. This separates the fibres making them finer and pulls out the shorter and scruffy fibres, these are left behind in the combs. Starting with the coarse combs and working down to the finer combs.

To finally prepare the flax 'line' for spinning you repeatedly comb it with a very fine comb (I use a wool carder) and beat it to soften it.
Whilst you have this lovely strick of long straight flax you are also left with the tow. Tow is the mess left in the combs. This too can be spun and used. I love spinning Tow. Spinning any type of flax is better done with damp fingers.

Spinning flax 'line'
I have used nettles to make string for years. It is about now it is at its best for that. This is easy. Pull a nettle whilst wearing gardening gloves. Run your gloved had up and down the nettle stem a few times to neutralise the sting. The fibres, like flax, are on the outside of the plant. But, like flax there is an epidermis above this. During the beating of flax this comes off as dust. Flatten the nettle stem, this makes it easier to separate the fibres from the woody core. These can be twisted by hand into cord. These are still full of wet green organic matter that will dry and loosen the string very quickly. It can be dried for an hour in the shade to minimalize this. But, it is good for all sorts of jobs. This is the most basic way of utilising the fibres from a nettle.
I have started an experiment where I plan to process nettles like I process flax. I have noticed lovely fine white fibres coming away from the finished dried string. Also I have come across references to nettle cloth.
So Firstly I pulled these nettles. They grow everywhere and require no particular work as a crop!
I have built a temporary retting pond from an old paddling pool and placed the nettles in this to ret.

not pretty, but, a means to and end....

The nettles are submerged in rainwater from the water butt. They are held under the water with bricks and rocks. I have no idea how long this will take but they have only been in there 24 hours so far.
If the experiment works there will be very little yield in comparison to flax.
Saturday, 8 February 2014
Natural Cord
Natural Cordage:
Hazel Bark
It has been very stormy here over recent weeks. It has not stopped raining since before Christmas!
Many trees have fallen to the power of the wind. Whilst walking I came across one of these. A Hazel about 20 years since it's last coppicing. So it was sizeable. I wondered about the quality and uses for the bark and quickly made a bark stripping device to take some of this valuable resource home. (A bark stripping device is a spatula shaped piece of wood.)
I did sit next to the tree and make a little string and left it there. This was far more of a success than I thought it would be.
The bark comes off fairly easily in strips not really wide enough to make large boxes. I am sure it could make tubular containers though.
I proudly carried my bark strips home and sat in the hallway splitting the bark and removing the stiff outer bark to get to the more flexible under bark. I then manipulated it to make it softer to work with and then twisted it into to cord in the usual way.
It will take more practice to make a good strong cord but there is a lot of potential.

Cord made from the inner bark of the Hazel tree.
It is not as strong as commercial rope the same thickness but it is very serviceable. But, with more attempts I am sure I will improve. I will try to get some bark later in the year when it will be wetter.
Spurred by this success I made a small box from some bark sewing it together with strips of the inner bark.

The tiny box.
Friday, 24 January 2014
Primitive Archery
My humble experience....
I have been making bows and arrows since I was a kid! Quite normal if I was a boy, but, as a girl this raised a few eyebrows! I tried to 'grow out' of it, but, recently I went back to it.
I am not an expert in primitive archery, a very avid enthusiast I would say. I have never got really good at making the equipment or using it.
I would like to share my most recent basic experience...
I had been looking for a lovely bit of yew for years. I came across some on eBay in the shape of a lovely long thick sucker branch. I received it in the post and looked at it. It did look as though the grain had grown twisted but I persevered. I got an expert to split it and our worst fears were realised... It is no good for making a bow. It has grown in almost a 180 degree twist! So it was back to the wood I have all around me... Hazel.....
I sometimes have a bit seasoning in the garden and surveyed what I had. One bit looked suitable. Hazel is best ustilized in this manner by making a flat bow. So that is what I did. I do not use power tools as I am a bit of a wimp. Also I feel as though it is cheating for me. So out with the knife, surforms and files. I had forgotten how much work it is.
After getting the basic shape I took it to a bit of heat to straighten up the worst bits. I have used my own made hemp string.
Well here it is....

Unstrung.

I may need to do some more work on it.
A very useable result. I would estimate a 30-40 lb draw weight. I do not know how long it will last. I will make more later in the year if I can secure more wood.

My own hemp string.

Hand woven decoration using my own spun wool and flax. An Amazon Parrot feather added for fun.
There was an old American Indian saying...
'Making the bow is easy, making the arrows is a whole heap of trouble!'
The arrows are also made by me. Hazel again. I try to keep a supply of hazel shafts seasoning around the place.

Seasoning shafts
It is good to tie the shafts all together whilst seasoning as this prevents too much warping whilst they are drying out. All tied up using my own hemp and flax string. This will ease the later job of straightening them. I sometimes take the bark off before lying them down and sometimes I do not. It just depends on what mood I am in.
Once seasoned the next job would be to take the bark off if I have not already. Then straightening them. Gently heating them over the hob in my case trying not to burn them but get them too hot to touch. Heat the area you wish to straighten. When it is hot enough bend it straight and hold it there until it cools. Keep doing this until when you look directly down the shaft it is as straight as a ruler. You may find there are more kinks and bends than you realise. A twig can look very straight until you look down it. It can have the ability to bend in more than one direction at once too. It takes a bit of practise, like a lot of these skills, but it is worth trying. Once you have a nice straight shaft it is very satisfying.
Next job would be for me to put in the finger grip.

I taper the arrow like I have seen on arrows from the Amazon.
Then I like to fletch it. I have a few Buzzard feathers around So I thought I might use them. These I found quite difficult to split as they do not have the long dipped ridge in the quill like turkey and goose feathers. This ridge gives the feather quill strength so the bird can take off from the ground. If the feather has come from a bird that spends most of it's time in the air they it do not need this ridge. So a lot of ground birds will have it. Splitting feathers is tricky. I use my knife making sure it is very sharp and trying to keep a steady hand constantly pressing against a surface and then moving the knife up the feather a little more then pressing again.
I like to make my arrows long, again I am influenced by the Amazon. They are easier to find in the undergrowth from my experience, but it also means, so I have heard, the arrows have a better stabilising effect in flight. For this reason I use just two fletchings on these arrows. For the shorter arrows I use three. Use only the feathers from the same wing. The feather will curl in one direction and the arrow will spin in flight. This is what stabilises it's flight.
Using two flights is much easier than using three. I use waxed linen sewing thread, splitting the fronds gently with my awl as I rotate the shaft. I start mine from the front of the feather. It seems I am unusual there. The Amazon people start their flething from the back of the arrow/feather. I will give this a try to see if it has any advantages. You can also glue the feather in place first if you wish. I do not. There are all sorts of manufactured and home made jigs you can get to make the fletching easier. I tie my fletching temporarily to the shaft removing the temporary fixing when It is convenient.
You can trim the feather into a shape. I like to keep mine basic. I like large flights as they are more aesthetic. But, of course this makes the arrow fly more slowly over a shorter distance. Seeing as I am only target shooting over short distances in the woods it does not bother me.

Top and bottom, Buzzard. Middle, barred turkey.
You can then insert the knock with a small file. Be sure when you do this the positioning of the arrow on the string does not make the feather have to pass the wood hand grip of the bow as this can make the arrow fly wild. You may also want to position it so the flight does not pass too directly over your hand to avoid burns. I make a U shaped knock as that fits my string nicely.
Then the pointy end.
I have made some antler points by sawing off flat bits of antler then just working them into the desired shape. Finding a flat enough bit that is the right size on an antler is a job in it's self! I am not a flint knapper, if I was that would be what I would do. I also have a supply of metal arrow heads I have kept over the years. But, I do want to keep the arrows all natural sometimes. Then you have to either saw or file a notch in the arrow to take the point. This can be fiddly but a good fit does help. You can glue it in place using pine pitch and charcoal or animal glue. I find soaking sinew in water and binding it tight is enough.

Antler arrow heads bound with sinew.
I do also make arrow heads from hard wood and bind them in the same way, but these are not as durable. Antler does become more carve-able if hot. Bear in mind that heating does also make antler more brittle as the heat breaks down the collagen in the antler. But, the pithy inside does become an instant glue with boiling.
I keep the antler shaving to make glue. I try to waste as little as possible, like our ancestors. Knowing the uses of many things means more can be ustilized with the right knowledge.
The finished arrows will have a tendency to bend. They will need constant attention to keep them straight. Just take a look down them before you plan to take them out and use them and either cool straighten or heat straighten as required.

Tuesday, 21 January 2014
Creative Bush Craft.. Pre Historic Bangle
A Slate Bangle

I just thought I might share a creation I made about eight years ago. I made this after watching an episode of Time Team that used to air on Channel 4. In this particular episode they were excavating on Bownsea Island (I think). After finding mysterious slate bits, they realised they had actually found a slate bangle production centre possibly from the iron age. These bangles were constructed on a lathe and what they had found was the waste centres.
These bangles were believed to be special in some way. They do look amazing. I was compelled to give it a go.
Mine was made by sawing a rough round shape. Then drilling a hole and then sawing out the middle. Then lots more elbow grease in smoothing it and polishing it. None of this done with power tools. I blunted a few saws making it.
I love wearing it but it is fragile. I imagine many were broken and it was that, that kept the production centre going.
The middle became a whorl for a drop spindle!

Sunday, 19 January 2014
Living free... Creative Bush Craft
Basket
Making use of what is freely available around you is so liberating. You are not so reliant on the commercial world.
Of course our ancestors had no other choice. If you needed something you had to have the ability to produce it yourself or know of someone in the community who could.
Baskets are one illustration of that. Until recent times here most people may have known how to make this vessel to carry a burden. There are many ways of producing these, and there are some very fine examples from around the world. The Native people of California produce the most amazing works of basketry art. Some peoples believe that when you weave a pattern into the basket you must weave an exit in the pattern to keep the spirit of the object from being trapped.
I am not an expert basket weaver and my wicker work is anything but aesthetic! But, it serves a purpose. I was surprised though when I sat down to make my own woven straw basket.

I used straw. This is freely available where I work. The string I made myself from tow. This is the waste product from making linen from flax. It looks like a mass of tangled horse hair with fluff embedded in it. But, this can be spun into very useful string.
I used a hand forged iron needle to 'sew' the basket. If you have ever made a coiled clay pot, making a straw basket is like that. Instead of the clay naturally sticking to itself you have to sew the bundle of straw to the layer below. It has made a very sturdy basket. I made a lid to ensure safe carriage of my forage. Also, the lid makes a great winnowing tool if I need it. It is a very lovely object in it's own right. Things like this seem to create themselves. We only put it together.
I did make a net of white cotton string so I can carry the basket more easily whilst foraging. I made some scruffy feather tassels to hang from this. I will in time make the net from my own string.
So something from seemingly nothing!
You can produce these from other things.. Plastic bags (the non biodegradable sort), rags or long grass from the garden. The magic is out there, just open yourself to it!
I hope to experiment more this year with coiling baskets where you do not use a needle but wrap the straw with some long wide grass.

You can see here some hemp, nettle and flax string below the basket.
Thursday, 16 January 2014
My Ethnographic expression...
When brain tanned buckskin is mentioned people automatically think.... Native American, war shirts and pipe bags. Well, I thought it about time to widen my perspective a bit!
Not that there is anything wrong with making Native American inspired art. I have learnt an amazing amount from a lifetime creating Native American styled items and I am sure there is almost an infinite amount still to learn. But, is my focus on the 'New World' blinding me to my own hunter gatherer and early farming heritage and the fulfilment learning more about that can offer me as a European. I am not a fan of this commercial and artificial world and often 'want out!' I believe there is an integrity we have lost that a lot of other 'primitive' cultures still have. (I do not like the term 'primitive culture')
I am inspired by the landscape I was bought up in and love here in the south of the UK. I want to make my own set of 'stuff' I might need and like if I were living the life of a hunter gatherer from this country. So I want to keep away from anything too modern and mass produced, to steer away from the superficiality that our culture today seems to relish. I want to try and create my own 'ethnographic' tools and artifacts. I found it very difficult to pull myself away from Native American art as this has inspired my creativity from childhood. But it has given me a good grounding to start from!
I am, and have been all my life, very interested in bush craft and am highly respectful of hunter gatherer and simple farming societies around the world, and as part of this I am intrigued by our stone age ancestors and how they lived and survived. I am convinced our stone age ancestors had a culture as well developed and complex as any. I think it is a mistake to consider them 'primitive' and having so much difficulty surviving that they had not developed a cultural expression, we know as art today. It is universal to put effort into creating everyday objects, so much so that we may look upon them as art. To beautify daily life and routine with cultural expression is, I believe, a human trait.
I made a bag for my walks in the forest. Made from sinew sewn pieces of smoked brain tanned buckskin. Using brains to cure animal hides is an ancient technique. Leather cured with animal fats and oils were found with Otzi the ice man. Sinew has been used to sew together items of animal hide in the past and are still used now. The Evenk reindeer herders of Siberia are amongst those who still use the back strap sinews as thread.
I decorated it with mallard duck feathers, crow feathers a couple of trimmed buzzard feathers and some green parrot feathers. I am aware that some of these species are not native to where I live! But, it is what I had at the time.

I carry my 'trail' kit in there. This includes a knife, folding saw, matches, candle, my hemp and nettle string, some dried fruit and fruit leathers, a glue stick with resin glue and some plastic bags. The matches are there for an emergency. My flint and steel are in my other work bag. And in time I hope to replace the plastic bags with rawhide (or some such) containers.

It has accompanied me on many forest walks. The plastic bags are very useful for collecting different forage and keeping it separate so I do not have to sort through it later.

Another use of spare buckskin is to cut it into strips and weave it into something useful. Such a valuable resource is worth making the most of. Here I have made a belt using the hand weaving technique called finger weaving. This is an ancient and almost universal technique that needs no tools. All you need to do is fix one end and then alternately weave each strip over and under. It takes a bit of practise. Much more complex patterns can be wrought using this simple technique. I have used mostly smoked pieces here but I have accented it with two strips of un-smoked to create a lightning pattern.
This is a start on a trail I wish to continue. I have done quite a few bits and pieces and plan many more. It, so far, has been a journey of self discovery.
This year I would love to spend more time out there in the forest. I plan to produce more and use a lot of my own tools and equipment from nature where I can. I can't imagine the amount of knowledge that has been lost with the passing of the generations. It is saddening that we value the newest gadget more than what is held within an individuals head and the ability to create something from the environment around you.
To go out into nature and feel perfectly at home there. That is a better goal than owning the best TV or car or newest phone. There is a completeness and peace one can gain from learning the way of nature and becoming part of it.

Friday, 10 January 2014
New Gadgets
I am not very technical but I have found how to enable people to comment on my blogs.
Feel free but be nice!
Thank you
Tuesday, 7 January 2014
The Quiver
I have for some years wanted to make a quiver. I finally got the excuse and the opportunity in December.
This one I made from brain tanned buckskin. I only had pieces left so I had to sew pieces together to make a piece large enough for a quiver.
After sewing the pieces together the next job I did was to make a rawhide insert to fit in the base of the quiver so the arrows do not wear the buckskin so quickly. Rawhide is really versatile stuff. It is very tough and stiff until you wet it. When it is damp and pliable you can from it into a shape and hold it there until it dries and it will keep that shape until it gets wet again. I made a raw hide 'cup' that would fit neatly in the bottom of the quiver. Whilst this was drying it was then the long job of the beading.
For the beading I wanted to use colours inspired by the forest so this meant lots of greens. I wanted to avoid red as this in nature tends to be a colour of warning and so stands out too much. I used mostly size 13 Charlotte cut beads so it took longer to complete than it might have done. I also used some size 11 Charlotte and some plain size 12. I am really pleased that the beading still looks neat even though there is a range of sizes.
I have sewn it together using sinew and linen threads.


The feathers here are the off-cuts from making flights. These are Buzzard.

I now finally have a quiver to take with me whilst practising my primitive archery whilst walking in the woods.
Shame the weather is so poor. It looks like I may have to wait some months before I get the chance to use it.
Sunday, 5 January 2014
The Seventeenth Century Skirt Update
Carrying on from an earlier post...
The 'Jacobean' skirt was finished and here are some pictures of me wearing it in a complementary setting.
The skirt created was made to be worn in houses from 1630-1680 approximately.


The under skirt can be worn as a summer version of the heavy skirt. This one is a thinner wool and is unlined.


The 'Jacobean' skirt was finished and here are some pictures of me wearing it in a complementary setting.
The skirt created was made to be worn in houses from 1630-1680 approximately.

Here in the Garden of one of the houses I demonstrate. I am wearing an underskirt that can not be seen here.
One of the aims of this fashion is to give women large hips. I do not need much help there! But this skirt certainly adds width. Lots of heavy cartridge pleating. This is a very heavy skirt and only really suitable for the cooler weather.
I did finish the bottom of the skirt with a strip of madder dyed wool. When the hem wears out all I have to do is replace the decorative edging.
Just a note the waistcoat is not quite right for that day. The waist coat is more 1560 -1630. The waist coat sleeves become more voluminous and it also evolves a flaring skirt like bottom to add the wide hip effect. Making the correct waistcoat is on the 'to do' list.. along with hundreds of other things...

And here tending to the fire.

And an underskirt. I am pulling nettles to make string.
The under skirt can be worn as a summer version of the heavy skirt. This one is a thinner wool and is unlined.

The Kitchen Maid by Hollar.
1640
Above can be seen at least two skirts. The outer skirt and her coif has been decorated with a little lace. A very popular accessory in this period. It seemed to quickly go out of fashion. I can only imagine this may have been due to its impractical and delicate properties. Here you can see she is wearing a fashionable waist coat for the lower sort.

The Milk Woman by Maes
1656
By the mid 1650s the lace was not so popular amongst the working class. The poorest of people could never afford any sort of lace.

Jan Sebrechts 1650-1675
And here in the summer or when at work the ladies wear just the unlined underskirt.
The Ford Jan Sebrechts 1670
Saturday, 4 January 2014
The Museum last year
Well, last year was a busy one at the museum. With very mixed experiences. It seems the recession has well and truly landed.
I did not have as much work from early autumn onwards. But, until then I was extraordinarily busy, doing many and varied tasks.
There was also the filming of The Tudor Monastery Farm. The more eagle eyed might catch a two second glimpse of me very occasionally.
Lion TV interpreted parts of the site as 1500. Just before Henry the Eighth came to the throne and we were still a deeply Catholic country. This is not strictly a period we cover at the museum but what they produced is very effective.

Clothing made by the volunteer needle workers group that gets used on a daily basis was used for the filming (except the monks costume above, that was bought by Lion TV).
Because this clothing is produced to cover a later Tudor period some alterations were made on a ad-hoc basis. Above this is the clothing we tend to wear for the 1540s. But, it was fun to see lots of people populating the place.
I did not have as much work from early autumn onwards. But, until then I was extraordinarily busy, doing many and varied tasks.
There was also the filming of The Tudor Monastery Farm. The more eagle eyed might catch a two second glimpse of me very occasionally.
Lion TV interpreted parts of the site as 1500. Just before Henry the Eighth came to the throne and we were still a deeply Catholic country. This is not strictly a period we cover at the museum but what they produced is very effective.

This is one picture my husband took during one of the filming sessions.
Clothing made by the volunteer needle workers group that gets used on a daily basis was used for the filming (except the monks costume above, that was bought by Lion TV).
Because this clothing is produced to cover a later Tudor period some alterations were made on a ad-hoc basis. Above this is the clothing we tend to wear for the 1540s. But, it was fun to see lots of people populating the place.
Friday, 3 January 2014
Some feather Craft
I am very inspired by the arts of the Amazon. Especially the feather crafts.
I wanted to make some things that look like they may have been gathered from an exotic trip. So I have used hemp string of my own manufacture. I have not used any modern findings or methods. I am also very interested in 'Bush Craft' and indigenous cultures. Also I like to try and imagine what my Palaeolithic ancestors may have made as an expression of their identity and culture.

Hair decoration inspired by the art of the indigenous Amazon people.

Above you can see body feathers of the Macaw. Each feather is individually attached to my own hemp string.

And the end is decorated with Amazon Parrot Tail feathers.
Subscribe to:
Comments (Atom)